Socialization of Cats and Dogs

0504 _ socializing _BlogTh.png

What is socialization?

Socialization is the process of preparing a dog or cat to enjoy interactions and be comfortable with other animals, people, places, and activities. Ideally, socialization should begin during the "sensitive period" which is between 3 and 14 weeks of age for puppies, and 3 and 9 weeks of age for kittens.

Advice to new puppy and kitten owners

Adopting a new kitten or puppy is a wonderful and exciting experience. It is also a time where a little extra planning can help a new pet develop a calm and confident temperament that will help them enjoy life to the fullest. The basic tenets of socialization are outlined below.

  • When adopting a puppy or kitten, ask for a pre- and post-adoption socialization plan.

  • Create a socialization plan specifically for your dog or cat to prepare him or her for life in your household. Plan exposures to the animals, individuals, environments, activities, and objects that will be part of his or her new life.

  • Provide regular positive and diverse experiences to encourage your dog or cat to enjoy new experiences without becoming fearful or aggressive.

  • Provide praise, play, and treats to reward engagement. Allow the dog or cat to withdraw if he or she is uncomfortable. Move at a pace appropriate for your pet's personality.

  • Well-managed puppy or kitten socialization classes are a good way to socialize your new pet within the “sensitive period” of a pet’s life.

  • Puppies or kittens that are not fully vaccinated should not be exposed to unvaccinated animals or places they may have been (such as outdoor parks).

  • Continue to reward your dog or cat for calm or playful responses to social interactions throughout his or her life.

  • For dogs or cats with special behavioral needs, develop a plan with your veterinarian and/or another animal behavior expert.


Hear From Us Again

Don't forget to subscribe to our email newsletter for more recipes, articles, and clinic updates delivered to your inbox (here). Or, you can keep up to date by liking and following our Facebook page (here).

Related: We have more information under our cat health + dog health + client care categories.

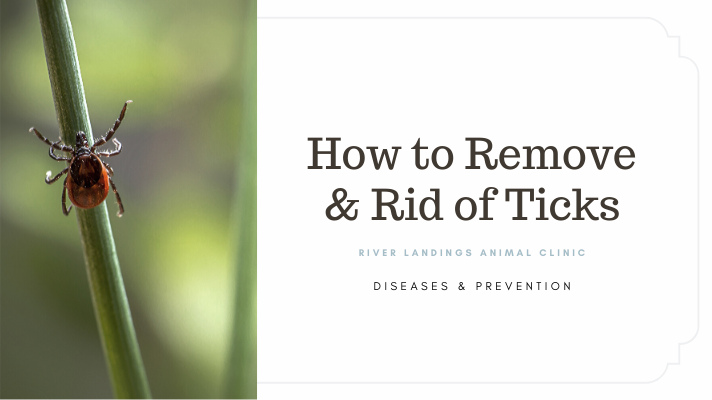
How to Remove Ticks on Dogs and Cats

0416 _ ticks _BlogTh.png

Ticks can transmit deadly diseases to a pet within as little as 24 hours of latching on, so swift removal is important for minimizing their exposure to disease.

While removing a tick may seem like a self-explanatory process, you’ve probably heard some myths about tick removal that can actually do more harm to your pet. Here’s the best way to remove a tick from a dog or cat safely.

What You’ll Need to Remove Ticks on Pets

Before you start the actual removal process, these are the supplies you should have on hand:

  • Tweezers (pointy ones work best)

  • Latex or rubber gloves

  • Rubbing alcohol

  • Antiseptic wipes (optional)

  • Jar or container with lid

  • Treats (for distraction)

How to Get a Tick Off Your Pet

Follow these steps to safely remove a tick from your dog or cat:

STEP 1: PUT ON YOUR GLOVES.

Ticks carry infectious agents that can affect both humans and dogs, so it’s always better to play it safe and wear protective gear.

STEP 2: STEADY YOUR PET AND KEEP THEM CALM.

When you’re getting ready to remove the tick, you’ve got to keep your pet calm. Any unusual poking or prodding tends to make dogs and cats nervous. If there is another person available, have that person help keep your dog relaxed during removal.

You may find it helpful to distract your pet with lickable dog treats. You may also use treats as rewards for cooperative behavior during the tick-removal process.

Never try to force your dog or cat to stay put. If your dog resists during the tick-removal process or becomes scared or aggressive, you should enlist the help of your veterinarian.

STEP 3: POSITION YOUR TWEEZERS.

Take a pair of tweezers—fine-tipped, pointy ones work best—and grasp onto the tick as close to your dog’s skin as possible. Grabbing close to the skin is the best way to get a tick head out.

Be careful not to pinch your dog’s skin.

STEP 4: PULL OUT THE TICK.

Using steady, even pressure, pull the tick straight out. This is the best way to remove a tick from a dog.

Do not twist or jerk the tick because you want to avoid leaving any part of the tick’s mouth or head behind. Also, make sure not to squeeze or crush the tick, since its fluids may contain infectious material.

Although you may have heard that you can remove a tick with a lit match, this is a dangerous myth! Doing so can cause a tick to release toxins or diseases into your pet.

After removing the tick, examine it to make sure the head and mouthparts were removed. If not, take your pet to a veterinarian to remove any remaining tick parts.

STEP 5: KILL THE TICK.

Kill the tick by placing it in a container with rubbing alcohol.

Once the tick is dead, most veterinarians recommend keeping it in the container with a lid in case your pet begins displaying symptoms of disease.

There are many types of ticks, and each tick carries different kinds of diseases, so keeping the tick can help your veterinarian make a proper diagnosis.

STEP 6: DISINFECT THE BITE SITE.

You can use triple-antibiotic spray or wipes to disinfect the bite site, or you can use over-the-counter chlorhexidine solution to clean the area.

Keep an eye on it for signs of infection. If the skin remains red or becomes inflamed, see your veterinarian right away.

STEP 7: PROTECT YOUR DOG.

Start your pet on effective flea and tick prevention to keep them safe. If you already have your pet on flea protection, read the label to make sure it also protects against ticks. If it doesn’t seem to be working, ask your vet for recommendations for an effective flea and tick treatment.

Make sure to keep a close eye on your dog or cat over the next few weeks. You should be on the lookout for any strange symptoms, including a reluctance to move (joint pain), fever, fatigue, loss of appetite, swollen lymph nodes or swelling at the tick bite site.

If your dog displays any of these symptoms, take your pet to your veterinarian immediately.


Hear From Us Again

Don't forget to subscribe to our email newsletter for more recipes, articles, and clinic updates delivered to your inbox (here). Or, you can keep up to date by liking and following our Facebook page (here).

Related: We have more information under our cat health + dog health + client care categories.

Does my indoor cat need to visit a vet?

0331 _ does my indoor cat need to go to the vet _BlogTh.png

There are myths and conflicting advice surrounding indoor cats and what is best for their health. Though cats have been domestic pets for more than 9,500 years, keeping cats as “indoor-only” pets has only risen in popularity in the last 100 years or so. As our cities expanded, so did urban and sub-urban dangers to free-roaming cats, and caring cat owners learned the best way to keep their cats safe was to keep them indoors. This may be one reason why what is best for an indoor-only cat’s health is still the subject of differing opinions and debate. One of the biggest concerns potential pet parents have about cats they adopt is their health.

So, if you adopt a healthy cat and keep them as an indoors-only, cat do they ever need to see a vet?

Well, even if your cat is strictly an indoor cat, it’s very important for all cats to receive regular veterinary care—including a complete checkup and screening tests at least once, yearly. One important factor to consider when determining your cat’s vet visit frequency is its age or stage of life. If your cat is a senior (11 years of age or older) or experiencing ongoing health issues, visiting the vet twice a year should be common practice. This allows the vet to assess your cat’s overall health and catch any conditions that often surface as a pet ages.

Indoor Cat Health & Happiness Tips

There’s no question that cats who live indoors-only live longer, healthier lives. Since health is directly related to happiness and lack of stress, and it is up to us cat caretakers to always be adding new hunting, watching, chasing, pouncing, sniffing, hiding, and listening enrichment to their indoor environment.

One way to keep your indoor-cat entertained is to give them lots of interesting and changing things to look at from their safe haven.

Some cats are “alpine explorers” who like to climb and get up as high as they can! They are the ones you’ll see at the top of the cat trees in a shelter’s communal cat room, who can nap on the back of the couch or on the narrowest bookshelf edge way up above your head. You can celebrate their mountaineering skills by creating indoor alpine kitties skyways and penthouses for their enjoyment. Here’s one idea: DIY Window Cat Perch.

Some cats are “cave dwellers” who like to hide in closets, under beds, and in cardboard boxes. Well, pretty much every cat I’ve ever met likes cardboard boxes! You can enrich your indoor cat’s life by helping a friend move and then recycling those boxes, or DIY a cardboard box cat castle like in this video.

Some cats love treats and really enjoy being treated for doing tricks! Tricks-for-treats training is a great way to provide mental stimulation for an indoor cat. Some tricks cats enjoy doing are coming when called, jumping up onto something on command, sitting, and sitting up.


Hear From Us Again

Don't forget to subscribe to our email newsletter for more recipes, articles, and clinic updates delivered to your inbox (here). Or, you can keep up to date by liking and following our Facebook page (here).

Related: We have more information under our cat health category.

Pet Poison Prevention: Toxins in the Living Room

0321_ toxins in bathroom.png

While your living room may be one of your pet’s favorite places to hang out, it can also be one of the most dangerous! Be cognizant of these common living room dangers and make sure to follow these helpful poison proofing tips.

Learn about your plants! Some common household plants may be toxic to pets (and not people). For example, lilies (Lilium and Hemerocallis spp.) are especially poisonous to cats, so quickly eliminate them from any bouquets. The ingestion of just 1-2 petals can be fatal to a cat. Always consult our Top 10 Poisonous Plants list before buying new plants for your home.

Keep home fragrance products, such as simmer pots of liquid potpourri, well out of reach. These products may cause chemical burns if ingested.

Never spray aerosols or any heavily fragranced products around caged birds. They are especially sensitive to any airborne products.

Keep ashtrays and smoking cessation products such as nicotine chewing gum or patches out of reach. Even cigarette butts contain enough nicotine to cause poisoning in pets.

Be careful with batteries! Dogs enjoy chewing on batteries and battery-containing devices such as remote controls and cell phones. If ingested, they can cause serious chemical burns.


Hang up your purse! Pets love to dig through purses and backpacks which often contain potential pet poisons such medications, cigarettes or sugar-free gum with xylitol.

Even with the best planning and intentions, our pets will occasionally be exposed to toxic substances in the living room. If you suspect your pet has had a toxic exposure call your veterinarian or Pet Poison Helpline immediately as time is of the essence. It is not always safe to induce vomiting or administer other home remedies. Seek counsel before taking action.


Hear From Us Again

Don't forget to subscribe to our email newsletter for more recipes, articles, and clinic updates delivered straight to your e-mail inbox.

Pet Poison Prevention: Toxins in the Bathroom

0321_ toxins in bathroom.png

Keep medications such as over-the-counter and prescription pills, inhalers and dietary supplements, safely locked up in secure cupboards. Do not leave them on countertops or tables or store them in plastic zippered baggies, which are easily chewed through.


Never medicate your pets with human products without first contacting your veterinarian. Some common human medications such as acetaminophen (Tylenol) and ibuprofen (Advil) are extremely poisonous to pets.

Always check the container before giving medication to your pet to make sure it’s the correct medication. Also, it is best to store your own medications separately from your pet’s. Pet Poison Helpline receives many calls from people who accidentally gave their own medication to a pet.


Keep pets away from cleaning products. Shut them out of the room while spraying bathroom cleansers or other products.


Close toilet lids to keep pets from drinking the water, especially if you use automatic chemical tank or bowl treatments.


Even with the best planning and intentions, our pets will occasionally be exposed to toxic substances in the bathroom. If you suspect your pet has had a toxic exposure call your veterinarian or Pet Poison Helpline immediately as time is of the essence. It is not always safe to induce vomiting or administer other home remedies. Seek counsel before taking action.


Hear From Us Again

Don't forget to subscribe to our email newsletter for more recipes, articles, and clinic updates delivered straight to your e-mail inbox.