Socialization of Cats and Dogs

0504 _ socializing _BlogTh.png

What is socialization?

Socialization is the process of preparing a dog or cat to enjoy interactions and be comfortable with other animals, people, places, and activities. Ideally, socialization should begin during the "sensitive period" which is between 3 and 14 weeks of age for puppies, and 3 and 9 weeks of age for kittens.

Advice to new puppy and kitten owners

Adopting a new kitten or puppy is a wonderful and exciting experience. It is also a time where a little extra planning can help a new pet develop a calm and confident temperament that will help them enjoy life to the fullest. The basic tenets of socialization are outlined below.

  • When adopting a puppy or kitten, ask for a pre- and post-adoption socialization plan.

  • Create a socialization plan specifically for your dog or cat to prepare him or her for life in your household. Plan exposures to the animals, individuals, environments, activities, and objects that will be part of his or her new life.

  • Provide regular positive and diverse experiences to encourage your dog or cat to enjoy new experiences without becoming fearful or aggressive.

  • Provide praise, play, and treats to reward engagement. Allow the dog or cat to withdraw if he or she is uncomfortable. Move at a pace appropriate for your pet's personality.

  • Well-managed puppy or kitten socialization classes are a good way to socialize your new pet within the “sensitive period” of a pet’s life.

  • Puppies or kittens that are not fully vaccinated should not be exposed to unvaccinated animals or places they may have been (such as outdoor parks).

  • Continue to reward your dog or cat for calm or playful responses to social interactions throughout his or her life.

  • For dogs or cats with special behavioral needs, develop a plan with your veterinarian and/or another animal behavior expert.


Hear From Us Again

Don't forget to subscribe to our email newsletter for more recipes, articles, and clinic updates delivered to your inbox (here). Or, you can keep up to date by liking and following our Facebook page (here).

Related: We have more information under our cat health + dog health + client care categories.

How to Remove Ticks on Dogs and Cats

0416 _ ticks _BlogTh.png

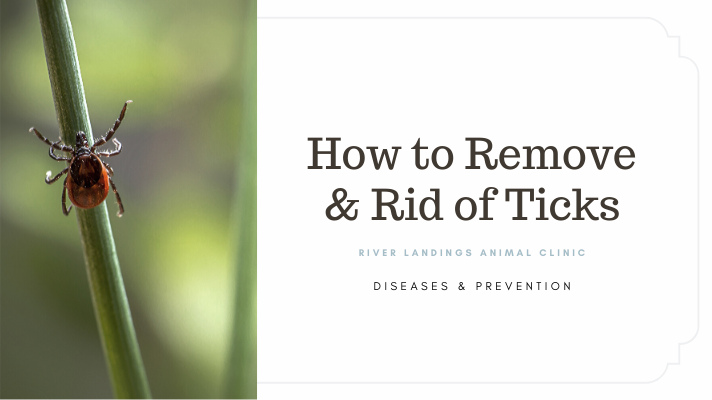
Ticks can transmit deadly diseases to a pet within as little as 24 hours of latching on, so swift removal is important for minimizing their exposure to disease.

While removing a tick may seem like a self-explanatory process, you’ve probably heard some myths about tick removal that can actually do more harm to your pet. Here’s the best way to remove a tick from a dog or cat safely.

What You’ll Need to Remove Ticks on Pets

Before you start the actual removal process, these are the supplies you should have on hand:

  • Tweezers (pointy ones work best)

  • Latex or rubber gloves

  • Rubbing alcohol

  • Antiseptic wipes (optional)

  • Jar or container with lid

  • Treats (for distraction)

How to Get a Tick Off Your Pet

Follow these steps to safely remove a tick from your dog or cat:

STEP 1: PUT ON YOUR GLOVES.

Ticks carry infectious agents that can affect both humans and dogs, so it’s always better to play it safe and wear protective gear.

STEP 2: STEADY YOUR PET AND KEEP THEM CALM.

When you’re getting ready to remove the tick, you’ve got to keep your pet calm. Any unusual poking or prodding tends to make dogs and cats nervous. If there is another person available, have that person help keep your dog relaxed during removal.

You may find it helpful to distract your pet with lickable dog treats. You may also use treats as rewards for cooperative behavior during the tick-removal process.

Never try to force your dog or cat to stay put. If your dog resists during the tick-removal process or becomes scared or aggressive, you should enlist the help of your veterinarian.

STEP 3: POSITION YOUR TWEEZERS.

Take a pair of tweezers—fine-tipped, pointy ones work best—and grasp onto the tick as close to your dog’s skin as possible. Grabbing close to the skin is the best way to get a tick head out.

Be careful not to pinch your dog’s skin.

STEP 4: PULL OUT THE TICK.

Using steady, even pressure, pull the tick straight out. This is the best way to remove a tick from a dog.

Do not twist or jerk the tick because you want to avoid leaving any part of the tick’s mouth or head behind. Also, make sure not to squeeze or crush the tick, since its fluids may contain infectious material.

Although you may have heard that you can remove a tick with a lit match, this is a dangerous myth! Doing so can cause a tick to release toxins or diseases into your pet.

After removing the tick, examine it to make sure the head and mouthparts were removed. If not, take your pet to a veterinarian to remove any remaining tick parts.

STEP 5: KILL THE TICK.

Kill the tick by placing it in a container with rubbing alcohol.

Once the tick is dead, most veterinarians recommend keeping it in the container with a lid in case your pet begins displaying symptoms of disease.

There are many types of ticks, and each tick carries different kinds of diseases, so keeping the tick can help your veterinarian make a proper diagnosis.

STEP 6: DISINFECT THE BITE SITE.

You can use triple-antibiotic spray or wipes to disinfect the bite site, or you can use over-the-counter chlorhexidine solution to clean the area.

Keep an eye on it for signs of infection. If the skin remains red or becomes inflamed, see your veterinarian right away.

STEP 7: PROTECT YOUR DOG.

Start your pet on effective flea and tick prevention to keep them safe. If you already have your pet on flea protection, read the label to make sure it also protects against ticks. If it doesn’t seem to be working, ask your vet for recommendations for an effective flea and tick treatment.

Make sure to keep a close eye on your dog or cat over the next few weeks. You should be on the lookout for any strange symptoms, including a reluctance to move (joint pain), fever, fatigue, loss of appetite, swollen lymph nodes or swelling at the tick bite site.

If your dog displays any of these symptoms, take your pet to your veterinarian immediately.


Hear From Us Again

Don't forget to subscribe to our email newsletter for more recipes, articles, and clinic updates delivered to your inbox (here). Or, you can keep up to date by liking and following our Facebook page (here).

Related: We have more information under our cat health + dog health + client care categories.

Why do dogs eat grass?

0402 _ why dogs eat grass _BlogTh.png

Why Does My Dog Eat Grass? And Should I Be Worried?

Is your canine companion chowing down on the lawn? You're not alone! Many dog owners are confused (and maybe a little worried) when they see their furry friend munching on grass.

Rest assured: Occasional grass-eating is normal dog behavior and usually isn't a cause for concern. But let's explore the reasons why dogs do it and when you might need to intervene.

Why Dogs Eat Grass:

  • Natural Behavior: Dogs, even wild ones, sometimes eat grass. It might be a leftover instinct from their ancestors.

  • Upset Stomach: Some believe dogs eat grass to induce vomiting and relieve tummy troubles. However, the evidence is mixed.

  • Fiber Needs: Grass is a good source of fiber, which aids digestion. If your dog's diet lacks fiber, they might seek it out in the lawn.

  • Nutritional Deficiencies: In rare cases, grass-eating could indicate a dietary imbalance.

  • Boredom or Curiosity: Puppies and young dogs might simply be exploring or trying to relieve boredom by nibbling on grass.

Signs to Watch For:

  • Vomiting After Eating Grass: While some dogs vomit after eating grass, it's not always the case. Frequent vomiting could indicate a more serious issue.

  • Loss of Appetite or Other Changes: If your dog's eating habits change significantly alongside grass-eating, consult your veterinarian.

  • Eating Harmful Plants: Make sure your dog isn't munching on toxic plants alongside the grass.

Should You Stop Your Dog From Eating Grass?

In most cases, no. Occasional grass-eating is harmless. However, you can address potential underlying causes:

  • Increase Exercise: If boredom is a culprit, provide more playtime and mental stimulation for your dog.

  • Adjust Diet: Talk to your vet about a high-fiber diet if you suspect a fiber deficiency.

  • Keep Your Lawn Safe: Ensure your lawn is free of toxic herbicides, pesticides, and plants.

When to See a Vet:

If your dog's grass-eating is accompanied by vomiting, lethargy, or other concerning behaviors, schedule a vet visit to rule out any underlying health issues.

ADDITIONAL RESOURCES


Does my indoor cat need to visit a vet?

0331 _ does my indoor cat need to go to the vet _BlogTh.png

There are myths and conflicting advice surrounding indoor cats and what is best for their health. Though cats have been domestic pets for more than 9,500 years, keeping cats as “indoor-only” pets has only risen in popularity in the last 100 years or so. As our cities expanded, so did urban and sub-urban dangers to free-roaming cats, and caring cat owners learned the best way to keep their cats safe was to keep them indoors. This may be one reason why what is best for an indoor-only cat’s health is still the subject of differing opinions and debate. One of the biggest concerns potential pet parents have about cats they adopt is their health.

So, if you adopt a healthy cat and keep them as an indoors-only, cat do they ever need to see a vet?

Well, even if your cat is strictly an indoor cat, it’s very important for all cats to receive regular veterinary care—including a complete checkup and screening tests at least once, yearly. One important factor to consider when determining your cat’s vet visit frequency is its age or stage of life. If your cat is a senior (11 years of age or older) or experiencing ongoing health issues, visiting the vet twice a year should be common practice. This allows the vet to assess your cat’s overall health and catch any conditions that often surface as a pet ages.

Indoor Cat Health & Happiness Tips

There’s no question that cats who live indoors-only live longer, healthier lives. Since health is directly related to happiness and lack of stress, and it is up to us cat caretakers to always be adding new hunting, watching, chasing, pouncing, sniffing, hiding, and listening enrichment to their indoor environment.

One way to keep your indoor-cat entertained is to give them lots of interesting and changing things to look at from their safe haven.

Some cats are “alpine explorers” who like to climb and get up as high as they can! They are the ones you’ll see at the top of the cat trees in a shelter’s communal cat room, who can nap on the back of the couch or on the narrowest bookshelf edge way up above your head. You can celebrate their mountaineering skills by creating indoor alpine kitties skyways and penthouses for their enjoyment. Here’s one idea: DIY Window Cat Perch.

Some cats are “cave dwellers” who like to hide in closets, under beds, and in cardboard boxes. Well, pretty much every cat I’ve ever met likes cardboard boxes! You can enrich your indoor cat’s life by helping a friend move and then recycling those boxes, or DIY a cardboard box cat castle like in this video.

Some cats love treats and really enjoy being treated for doing tricks! Tricks-for-treats training is a great way to provide mental stimulation for an indoor cat. Some tricks cats enjoy doing are coming when called, jumping up onto something on command, sitting, and sitting up.


Hear From Us Again

Don't forget to subscribe to our email newsletter for more recipes, articles, and clinic updates delivered to your inbox (here). Or, you can keep up to date by liking and following our Facebook page (here).

Related: We have more information under our cat health category.

Hamster Care 101

0326 _ hamster care _BlogTh.png

Hamsters are adorable, and if you had one as a kid, you probably remember them being easy pets to care for. As you can imagine, it isn't as easy to care for a hamster as it looked as a kid, but once you get the hang of it, you may find that it isn't all that hard either.

The Basics of Hamster Care

If you are thinking about getting a hamster for your child, it would be best if your child is in elementary school or older. A hamster is not ideal for very young children. They require a lot of care, can get a little nippy, and are not always great when handled in small hands. However, once your child is old enough to handle a hamster with care and help clean the cage, they make for a fun and educational pets for families.

What to Look For When Preparing to Bring Home a Hamster

What kind of hamster is right for me?

The amount and type of hamster you’d like is all up to your preference. Syrian hamsters, however, should never be put in pairs on account of the fact they will fight violently over their territory once they reach maturity. Dwarf, Russian, or Chinese hamsters are popular as pets but can be territorial in pairs, but do well only if they are littermates or a mother/child pairing.

What kind of cage should my hamster have?

When choosing a cage, it should be at the very least 15 inches long by 12 inches high, but always opt for something larger if you can extend such luxury to your hamster for additional room to exercise and explore.

What kind of bedding should my hamster have?

When looking for what bedding you might line your hamster’s cage with, it is best to avoid wood shavings. Look for bedding made from plant-based paper fibers or cellulose (an organic compound). Avoid using cat litter, corn cobs, newspaper, and any bedding that is scented (these contain chemicals that can cause respiratory issues).

What kind of toys should my hamster have?

When buying toys for your hamster, an exercise wheel is a must to prevent boredom, and you can also purchase a ball for your hamster to explore the house in (under supervision).

What type of foods do hamsters eat?

Premade bags of hamster food includes a mix of fruits, vegetables, seeds, and grains. However, it is important to supplement this diet with small pieces of fresh vegetables and fruit. It is important to also provide access to fresh, clean water.

What type of foods aren’t good for hamsters to eat?

Not all greens are good for hamsters, neither are all fruits and vegetables. Stick to broccoli, parsley, apple, pear, carrot and turnips while avoiding onions, garlic, chives, leeks, lettuce, raw potatoes and oranges. As hamsters can be prone to diabetes, you’ll want to give them fruit sparingly due to their high contents of sugar.

How to Clean a Hamster’s Cage

Hamsters need clean cages to keep them from getting sick with a number of conditions, including diseases that are transmittable to humans.

Move your hamster to a safe area

As long as you can keep your hamster from rolling off somewhere while you aren't looking, an exercise ball would be an ideal spot to keep your hamster while cleaning its cage. A second cage or deep container that your hamster can’t get out of will also work.

Get rid of bedding

Don’t worry about cleaning your hamster’s bedding, just throw it away and start fresh. Hamsters can sometimes hoard their food, so tossing all bedding will prevent hidden food from molding.

Wash the cage

Use regular soap and warm water to thoroughly rinse and clean your hamster’s cage or container. If you use vinegar, bleach or any other type of cleaning product on the container, make sure everything is thoroughly cleaned off and dried before adding new bedding and returning your hamster back to its cage.

How to Care for Baby Hamsters

If your hamsters breed or you take home a pregnant hamster, you’ll need to know how to care for the babies, which will be generally easy to do in the beginning. No matter how hard it is you must leave them alone for at least a week — just feed and water them and that’s all.

Get a sheet

Cover the cage with a sheet to give the mother an opportunity to get used to her new family, and to also keep odd smells off the babies (which will lower the risk of the mother harming them).

Take a break from cleaning

Give your hamsters their own space for the first week, and then begin cleaning the cage again.

Add protein to the mother’s diet while she nurses

This can include small pieces of boiled egg and chicken.

Separate the hamsters

Eventually, the hamsters will need to be separated, which can be done in the form of purchasing new cages for them to live in or rehoming the babies to new pet parents. Dwarf hamsters should be sexed and separated at about four to five weeks old; Syrian hamsters at about six weeks. Not separating your hamsters can encourage fighting amongst them, spread diseases, and encourage even more pregnancies.

Setting Up Your Hamster’s Home

Start by purchasing everything you need for your hamster, like its cage, food, water, bedding and exercise wheel, then bring your hamster home. You’ll want to make the transition as easy as possible as it can be stressful for a hamster to go from a pet store or a shelter or a rescue to your home. While a pet store, shelter or rescues have loud people and unusual smells, your home has its own unusual noises and smells that your hamster will not be automatically adjusted to.

Hamsters are prone to a bacterial disease called wet tail, which can be caused by changes like coming to a new home or suddenly living in an overcrowded cage, and it can be fatal if not treated within 48 hours. Signs of wet tail include lethargy, loss of appetite, failure to groom and diarrhea. If you see any of the above signs, call your veterinarian immediately to have your pet examined and bring a stool sample to the visit for parasite testing.

Do things right, however, and you and your family will probably love having a hamster. Hamsters are very smart and can be trained. Although at times skittish, you can begin gaining trust to hold them by giving them a treat when they are in your hands. If they're getting food as a treat, they smell your hands and see your fingers and anticipate being held & pet, and getting a nice treat.


Hear From Us Again

Don't forget to subscribe to our email newsletter for more recipes, articles, and clinic updates delivered to your inbox (here). Or, you can keep up to date by liking and following our Facebook page (here).

Related: We have more information under our small animal care category.